.svg)


Gunnar Morling recently shared a video presentation on Apache Flink and Flink SQL. Here at Decodable, we have long believed that Apache Flink is the best real-time stream processing system, with a proven track record of meeting the demands of some of the largest and most sophisticated businesses in the world, such as Netflix, Uber, Stripe, and many more. This article summarizes Gunnar’s video and covers how you can hit the ground running to get the most out of Apache Flink.

When people learn about Flink, oftentimes they're very excited about the potential of stateful real-time stream processing. But at the same time, they might not be quite sure how to actually get started, how to deploy their first Flink cluster, how to set up their first Flink job, or how to run their first Flink SQL query. You might have similar questions, and this is exactly what we’re going to explore in this article.
We’ll walk you through how to use Apache Flink to take data out of one Apache Kafka cluster, transform it, and send the transformed data into another Kafka cluster. This is a common stream processing use case that’s applicable for a wide range of businesses.
Create a Redpanda Cluster
For our Kafka streaming platform, we will be using Redpanda, which is an implementation of the Kafka protocol written in C++. It is very fast, memory efficient, and provides low tail latencies. It also leverages Apache ZooKeeper, which makes it very easy to run and operate.
Redpanda comes with a nice command line client, rpk, which we can use for interacting with Redpanda clusters. For our example, we’ll use this to set up a cluster with three nodes. Once the cluster is running, we can see the URLs for each node, which we can export into an environment variable which makes using the rpk command easier later on. The local development environment we’re using is backed by Linux containers, so if we take a look using docker ps, we can see that those containers are up and running.
We can use the rpk command for creating a couple of sample topics: an input topic and an output topic. We’ll create these with a replication factor of 3 and a partition count of 30. We can now use the rpk cluster metadata command to see all the information about the cluster and those topics.
Create an Apache Flink Project
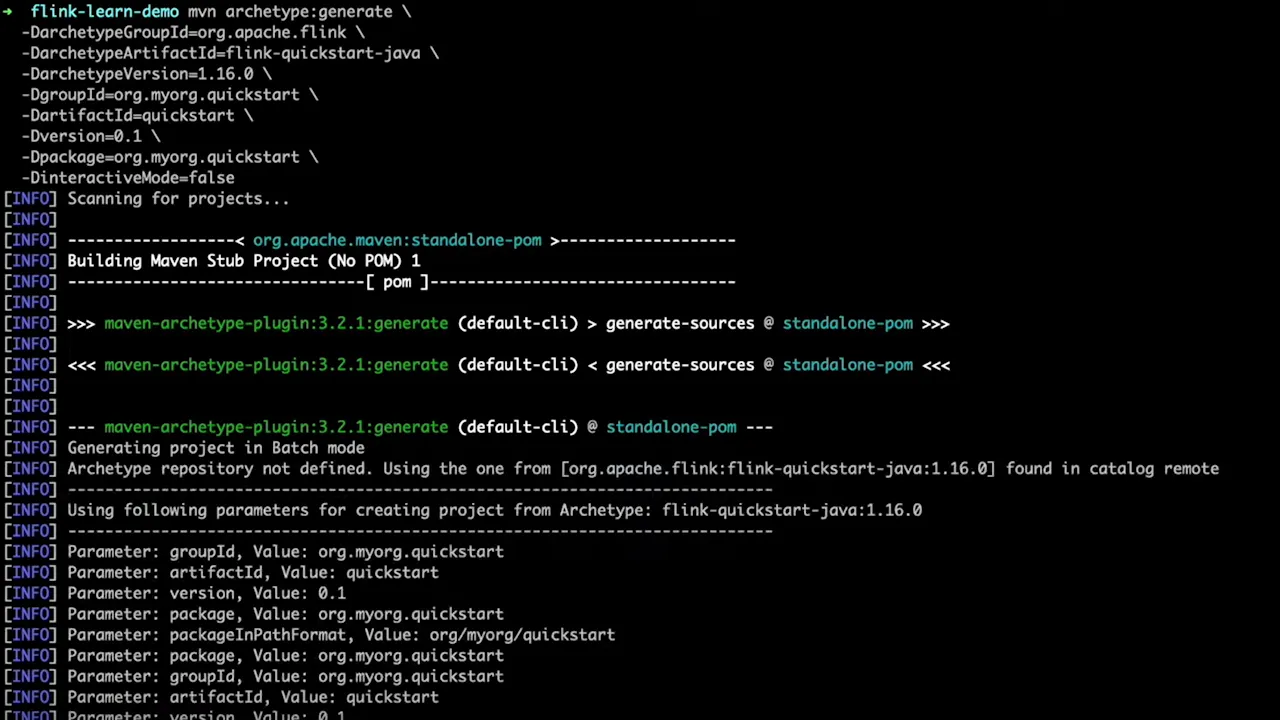
With the Redpanda topics set up, we can now create our actual Flink project. To do that, we’ll use a Flink quickstart archetype, which is essentially a project template. This generates a new Apache Maven project which we can quickly build. We can then open the project into an IDE.
Once in the IDE, the first thing we can do is make a few customizations to the auto-generated Maven POM file. We can specify Java 11 as the Java version, verify that Apache Flink is enabled as a dependency, and additionally enable Apache Kafka as a dependency.
Customize the Flink Job
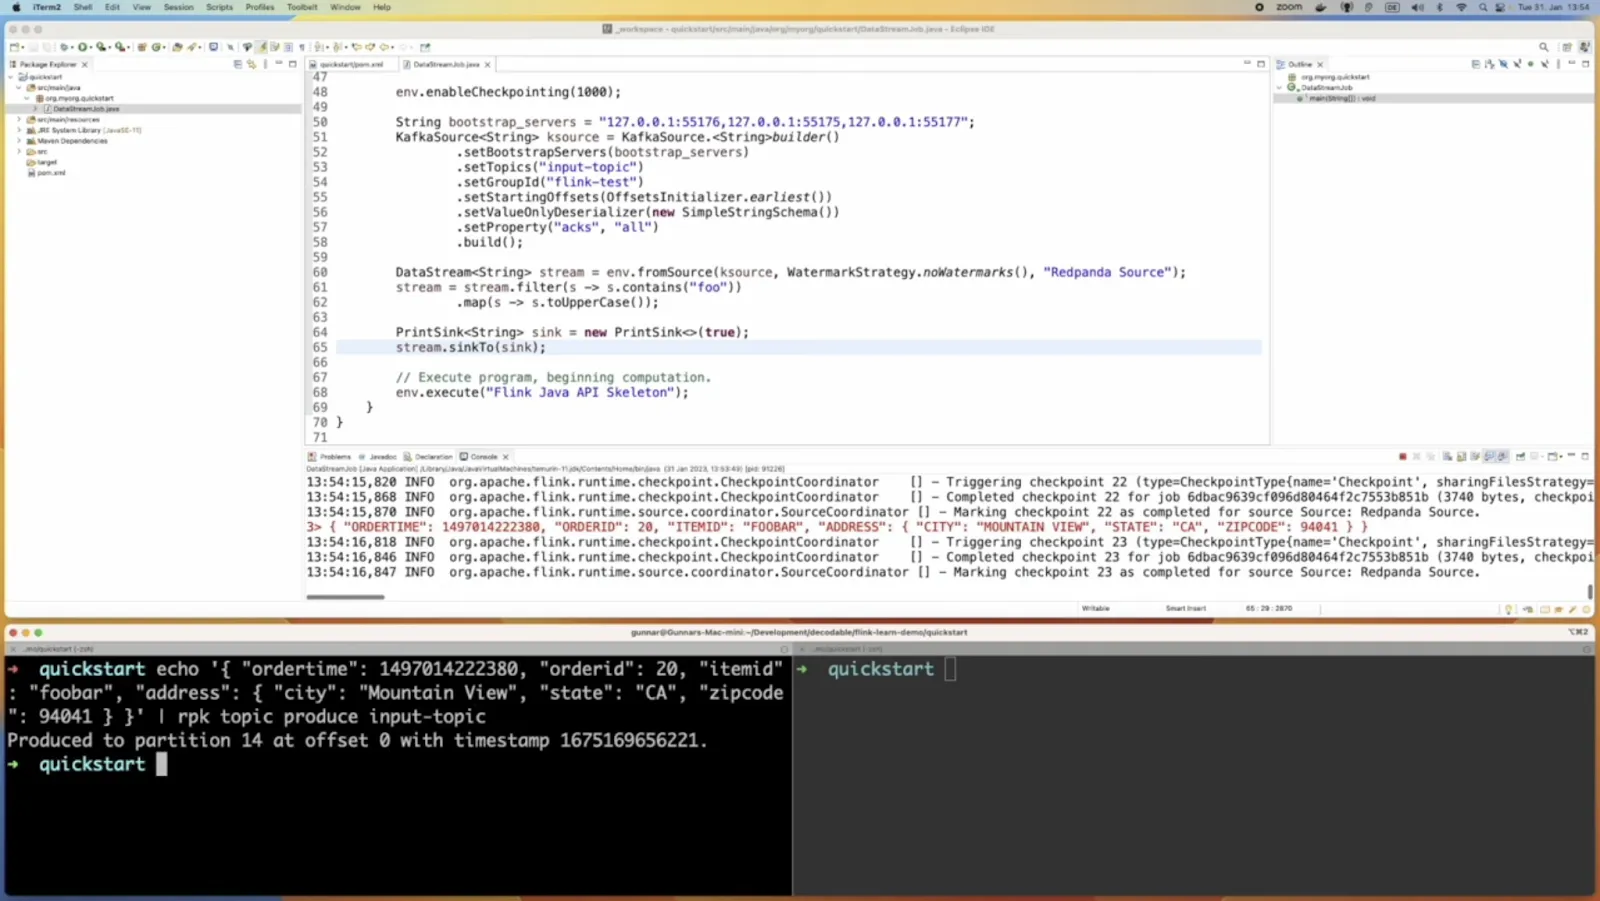
Now we can go to the auto-generated job class and start to work on our job definition. The first thing we want to do is configure checkpointing, which defines the behavior in case things go wrong. In our example, the job will need to be able to restart from a defined context, so we will create a checkpoint every 1000 milliseconds. We need to assign the bootstrap servers to a variable, and for that we can copy the URLs of the Redpanda cluster nodes we created earlier. Then we can set up a Kafka source—this is what connects to our Kafka topic, and it will use the name of our input topic.
The next step is to create a Kafka stream and assign it to a DataStream object variable. We can use the fromSource method, passing in parameters for our Kafka source, a watermarking strategy (since we don’t care about late-arriving events, we can choose to use no watermarks), and a name for the stream we are creating. At this point, we are ready to make use of the Flink stream processing API.
Filtering and Modifying Kafka Events
As an initial example of stream processing, let’s take a look at how we can filter Kafka events. On our data stream object, we can use the filter method to, for example, keep only the events which contain a specific phrase. We can further use the map method to modify the filtered events, for example, converting all messages to uppercase.
Having set up the stream, we can send it to a destination sink. As a simple example, we can create a sink that prints to the console. Then we can connect the stream to this sink so we can see the output. Let’s go ahead and test things out by running our Flink job from within the IDE.
Going back to the command line, \produce some messages to this Kafka topic using the rpk topic produce command and specifying the topic name. As messages are sent to the input topic, we can see them being printed out in the IDE.
Propagating Messages to a New Kafka Topic
Having seen that our Flink job is working as expected, we can take things a step further and propagate the data to another Kafka topic. For that, we remove the print sink and instead use a Kafka sink, which we will connect to the Redpanda output topic we created earlier. Now our Flink job will read the messages from the input topic, apply the filtering and mapping stream processing functions we defined, and write the new messages to the output topic.
When we run the job again, we can use the rpk topic consume command to show the messages coming to the output topic. The results of the command show our modified messages that have been converted to uppercase. We can also send new messages to the input topic and see those appearing on the output topic with slightly different timestamps and also changed to uppercase.
Deploy to a Flink Cluster
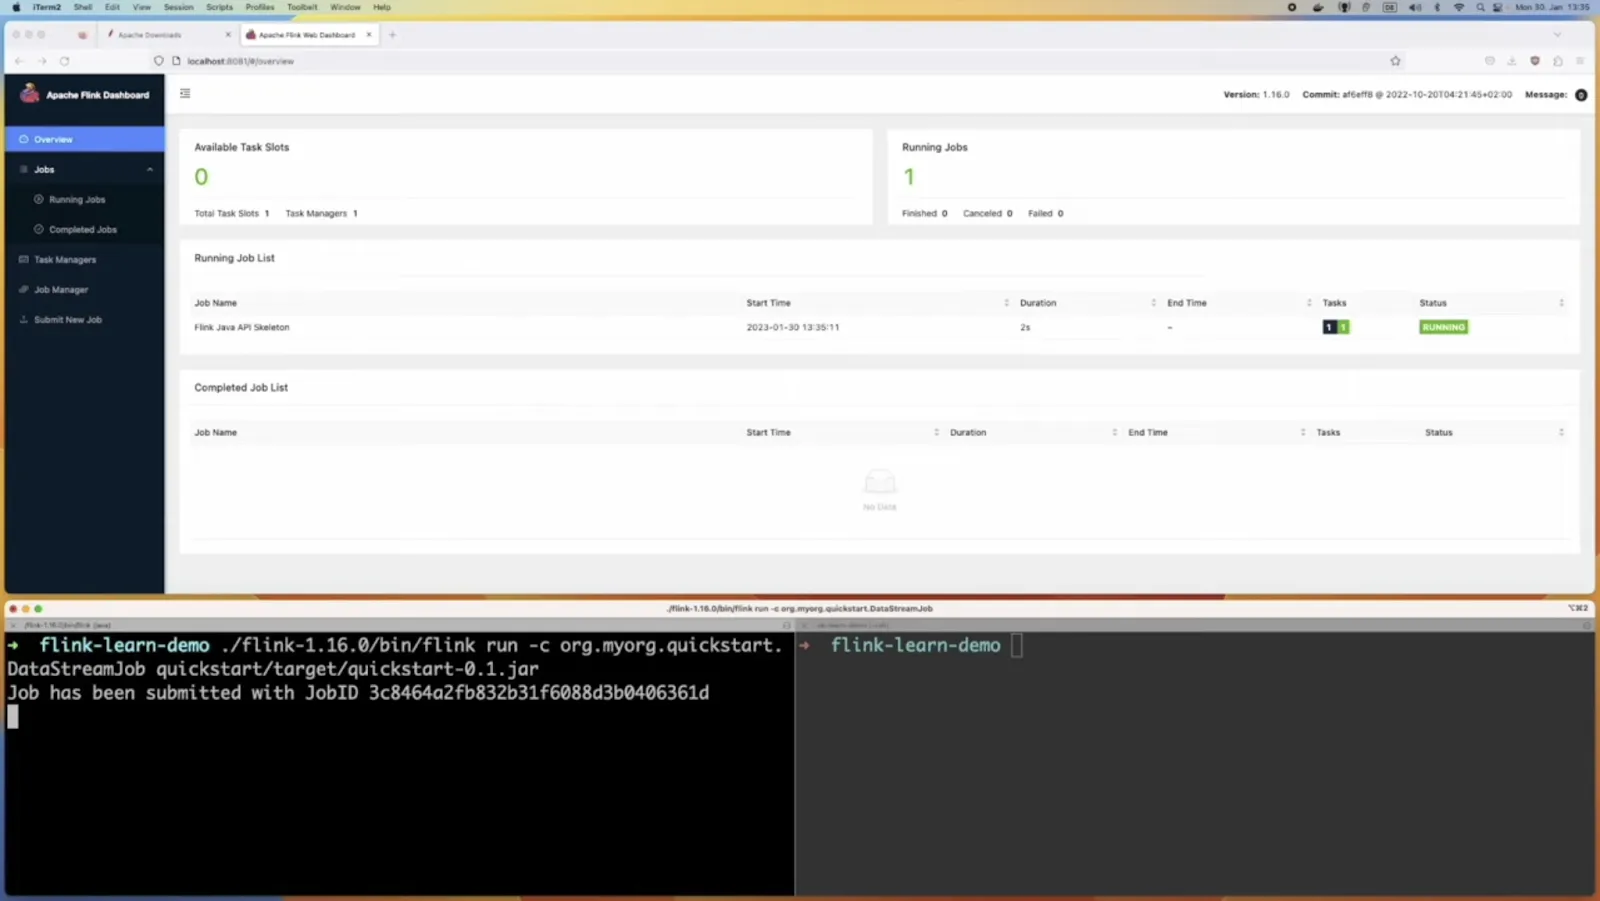
Let's graduate from running our Flink job in the IDE and deploy it in an actual Flink cluster. To set up a Flink development environment, we can go to the Flink website, download the Flink distribution, unpack it on a Linux development system, and execute the start-cluster.sh script which is provided in the /bin folder. Once it’s up and running, we can open up the Flink web UI in a browser on localhost:8081 to view the status of the cluster.
We’re now ready to deploy our job. To do that, we need to build it using mvn clean package, which creates a self-contained fat-jar of our job with all its dependencies. After, we can use the Flink run command to upload and start the job.
Within a few moments, we will see it show up in the Flink web UI as a running job.
Let’s verify that our job continues to work as expected. Using rpk, we again run a producer and consumer connected to our input and output topics, respectively. After messages start arriving, take a closer look at the timestamp and partition fields in the output topic. You’ll notice those values have been transformed as we send new messages in.
Running a Flink SQL Job
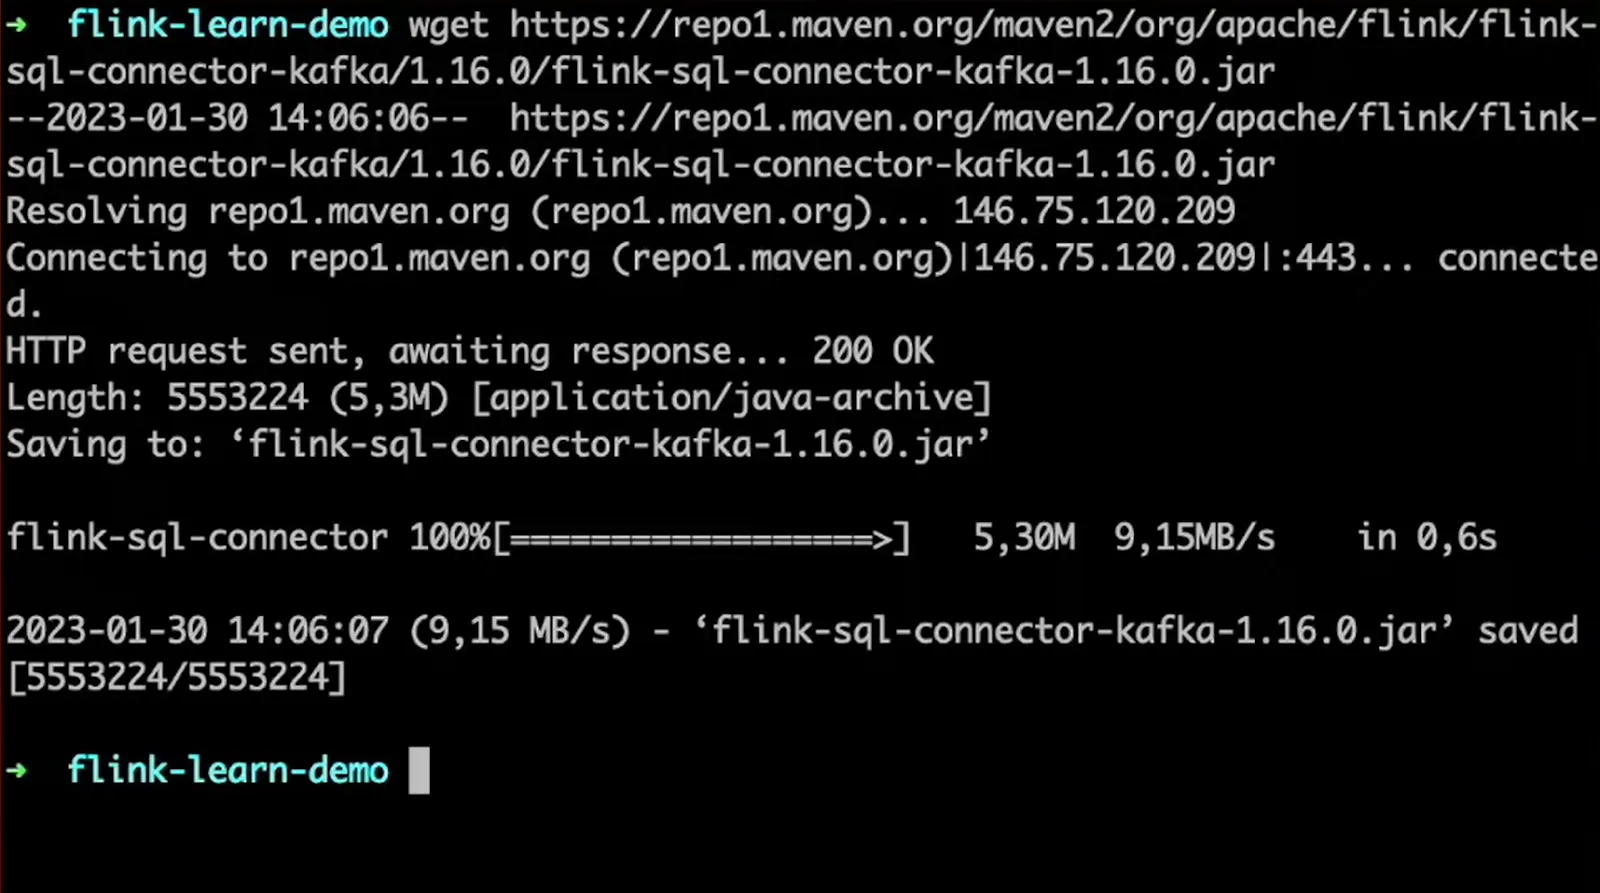
We’ve created a Flink job using Java, but it’s also possible to deploy similar stream processing logic using SQL, which is much more familiar across a broad range of engineers and developers. Specifically, we are going to use Flink SQL. Since we are using Kafka, we’ll need to download the Flink SQL Connector for Kafka.We can use wget to download that into our development environment, and then run the Flink SQL client. This gives us a prompt which lets us run SQL queries against our sources in Flink.
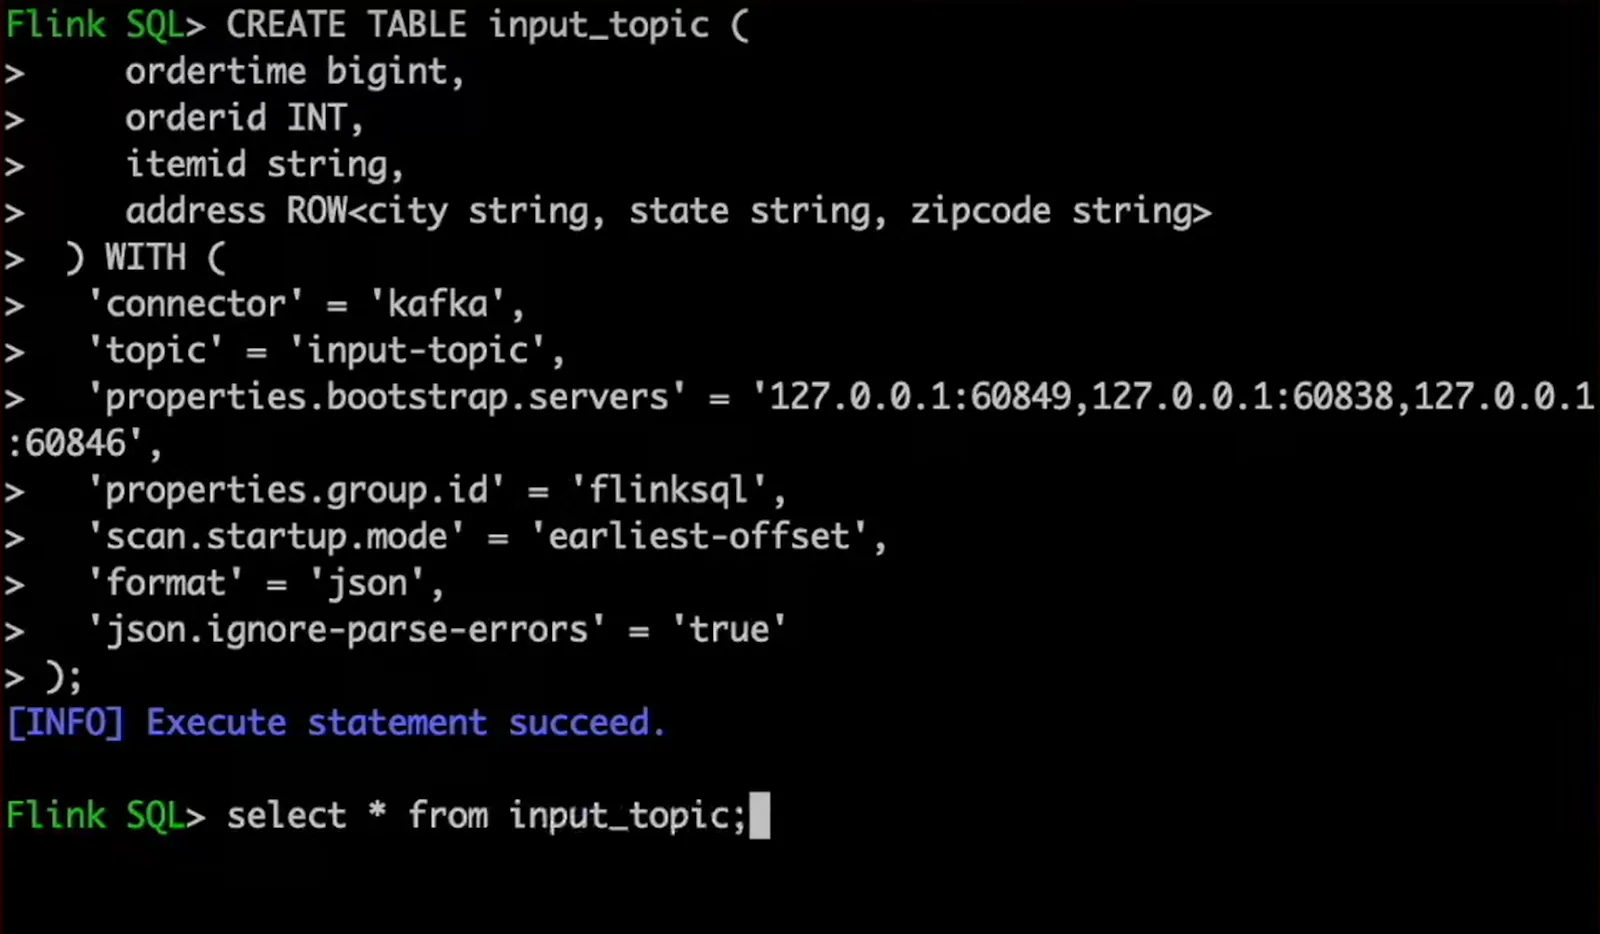
So first of all, let's create a table which represents our input topic. In the create table statement, we refer to our Kafka topic with the name, bootstrap servers, etc. We also describe the structure with ordertime, orderid, and so on. Now we can query that table, and a simple select query allows us to see all the rows. These results are updated in real time; so as we send new messages to the topic, we see that in the Flink SQL UI.
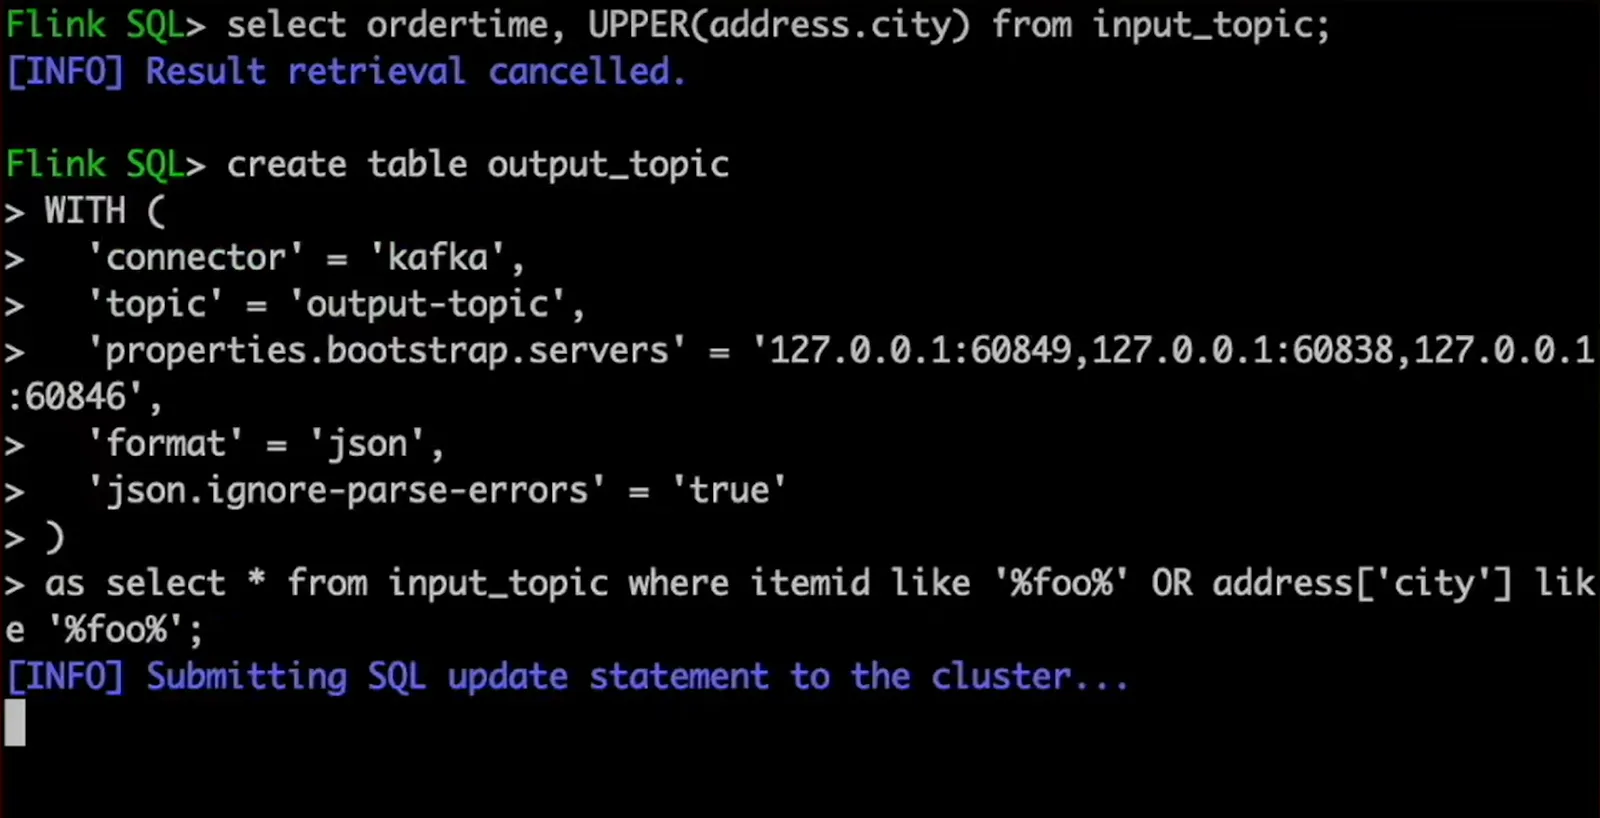
We can now apply all the capabilities of SQL. As an example, in our select statement querying from the input topic, let's apply the same uppercase transformation to the city name. As we can see, the results have their city names in uppercase. And when we push another message to the topic, we can see this additional row with the transformation applied.
Of course, having those results in the Flink SQL client console is not so interesting by itself. So let's close the loop and load this data into our output topic. For that, we create another table for the output topic that extracts rows from our input topic table. A new job is automatically deployed to Flink to keep the output topic updated in real time in response to new messages that appear in the input topic.
And there you have it. Within roughly 10 minutes, we have built our first simple Flink-based stream processing application. We have seen how to run Apache Flink, how to use its Java API, and how to use Flink SQL. That’s really all you need to get started with Flink development!
Additional Resources
- Check out the example code in our GitHub repository
- Have a question for Gunnar? Connect on Twitter or LinkedIn
- Ready to connect to a data stream and create a pipeline? Start free
- Take a guided tour with our Quickstart Guide
- Join our Slack community


